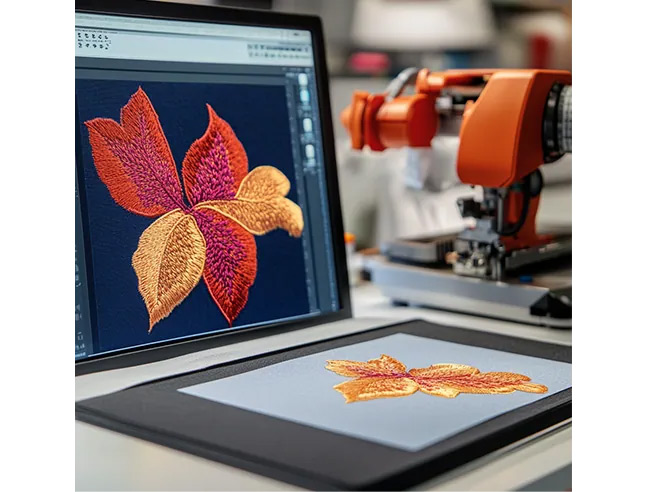
You have a perfect image—a logo, an artwork, a design—and you have access to the industry’s gold standard: a Tajima embroidery machine. To bring these two together, you can’t simply load a JPEG and press start. The machine requires a specific, coded language. The process to properly Convert Image for Tajima Embroidery Machine is a specialized craft that blends artistry with technical precision.
It’s not a conversion; it’s a translation from the visual world of pixels into the physical world of stitches, tailored for one of the most demanding commercial platforms in existence. This guide will walk you through the professional workflow, ensuring your design is Tajima-ready and sews flawlessly every time.
Understanding the Tajima Ecosystem: The .DST Mandate
First, the most critical technical detail: Tajima machines, especially the industrial multi-head workhorses that dominate production floors, primarily read the .DST file format. While some newer models may accept other formats, the DST (Data Stitch Tajima) is the universal language of commercial embroidery.
Think of a DST file as a supremely efficient set of GPS coordinates and commands for the machine head. It contains:
-
Stitch coordinates (X, Y positions for every needle drop).
-
Trim commands.
-
Color change signals.
-
Jump commands (moving the needle without stitching).
Your goal is to create a clean, optimized .DST file. A poorly constructed DST will cause thread breaks, registration errors, and production headaches, wasting time and materials on an expensive machine.
The Professional Workflow: From Image to Industrial-Grade DST
The journey has distinct stages, each vital for a quality outcome.
Stage 1: Artwork Analysis & Preparation (The Foundation)
This pre-digitizing stage determines success or failure.
-
Source the Best Possible File: Never start with a low-resolution, blurry JPEG from a website. Demand a vector file (.AI, .EPS, .PDF, .SVG). Vector graphics use mathematical paths, allowing for infinite scaling and crisp edges. If you only have a raster image (JPG, PNG), it must be high-resolution and clear.
-
Audit for “Embroiderability”: A skilled digitizer analyzes your image and asks key questions:
-
Scale: Are there details too small to stitch with thread? Tiny text under 0.25 inches will become an unreadable blob.
-
Color Count: Can the number of thread colors be simplified without losing the design’s intent?
-
Complexity: Do gradients, shadows, or photographic elements need to be re-interpreted as solid stitch areas?
-
End-Use: What garment or fabric will this be stitched on? A design for a stiff canvas bag is digitized differently than one for a stretchy athletic jersey.
-
Stage 2: The Digitizing Process (The Translation)
This is where the human craft takes over. Using professional software like Wilcom Hatch or Embrid, a digitizer manually translates your artwork.
-
Manual Pathing & Object Creation: The digitizer traces the design, creating separate objects for each color section. They assign the stitch type:
-
Fill Stitches (Tatami): For covering large areas. Density is carefully set based on fabric.
-
Satin Stitches (Column): For borders, text, and fine lines. Width and pull compensation are critical.
-
Running Stitches: For fine details and underlay.
-
-
Applying Industrial-Grade Engineering:
-
Underlay: This foundational stitch is paramount for Tajima production. It stabilizes the fabric, prevents puckering, and provides a base for top stitches, ensuring speed and quality.
-
Pull Compensation: Fabric pulls under tension. The digitizer offsets shapes so they sew out to their exact visual dimension.
-
Stitch Sequencing & Optimization: The order of sewing is planned to minimize thread trims and jumps, creating the most efficient path for high-speed production. This reduces machine runtime and wear.
-
Stage 3: Exporting the .DST & Testing
Once digitized, the file is exported as a .DST. But the job isn’t done.
-
The Test Sew-Out (Non-Negotiable): The digitizer or a technician runs the .DST file on a Tajima (or equivalent) machine using a scrap piece of the target fabric and stabilizer. This is the only way to catch physical issues the software preview can’t show: subtle puckering, registration misalignment, or thread tension needs.
-
Revision & Finalization: Based on the test sew, adjustments are made to the digitized file—tweaking density, underlay, or pull compensation. This iterative process ensures perfection.
-
Delivery of the Final .DST: You receive a robust, production-tested .DST file ready to load onto your Tajima machine and run with confidence.
Common Pitfalls & How to Avoid Them with Tajima
-
Pitfall: Using Auto-Digitizing Software.
-
Problem: Online “converters” or auto-features create inefficient, dense, and unsewable files. They ignore underlay and pull comp, leading to guaranteed production failures on a Tajima.
-
Solution: Invest in professional manual digitizing. The cost is trivial compared to the downtime and material waste of a bad file.
-
-
Pitfall: Ignoring Fabric-Specific Digitizing.
-
Problem: Using the same DST file for a fleece hoodie and a polo shirt.
-
Solution: Always specify the garment type. A professional will create adjusted versions for different materials, often at a reduced rate.
-
-
Pitfall: Skipping the Test Sew.
-
Problem: Discovering a design mis-registers or puckers after stitching 50 shirts.
-
Solution: Never skip this step. It is the core quality control measure.
-
Your Action Plan: Getting Your Image Tajima-Ready
-
Gather Your Best Art: Secure a vector file. If unavailable, use the highest-quality raster image.
-
Define the Specifications: Know the final dimensions (in inches/centimeters) and the exact garment/material.
-
Choose the Right Partner: Hire a professional digitizing service that explicitly mentions experience with commercial formats and Tajima/DST files. Ask if they offer test sew proofs.
-
Provide Clear Instructions: Submit your art and specs. A good service will ask clarifying questions.
-
Review a Proof: If offered, examine a digital stitch simulation for basic approval.
-
Test on Your Own Machine: Even with a pro’s test, run the final .DST file on a single garment with your fabric and stabilizer before starting a full production run.
Conclusion: Precision for the Professional
Learning how to Convert Image for Tajima Embroidery Machine is about embracing a professional standard. The Tajima is built for speed, reliability, and volume, and it demands files that match its caliber. By respecting the process—prioritizing vector artwork, relying on skilled manual digitizing, and insisting on a physical test sew—you ensure your designs leverage the full power of your machine.
The result is more than just a stitched image. It’s a durable, efficient, and perfectly executed product that reflects well on your brand and operation. In the world of commercial embroidery, the file is the blueprint. For Tajima, that blueprint must be engineered to industrial specifications. Invest in that precision, and watch your designs come to life with the quality and consistency that defines the industry’s best.